How to clean baked-on grease from a stovetop
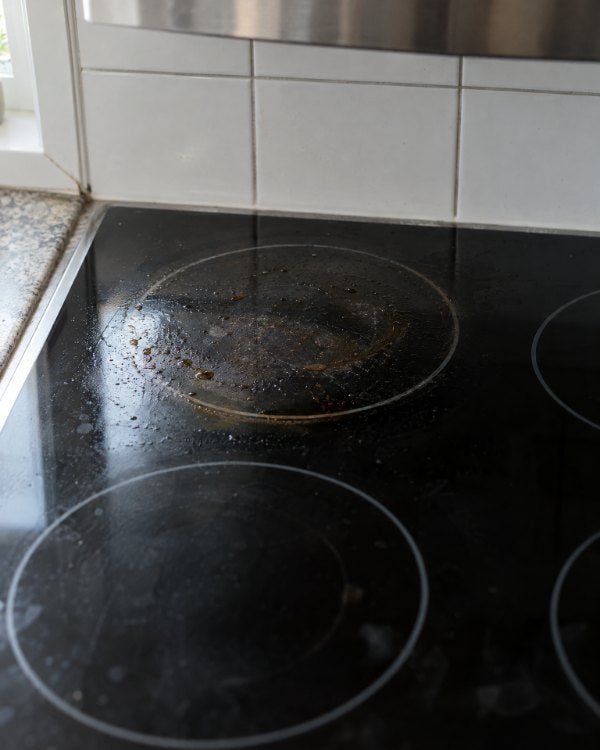
Baked-on grease is ordinary cooking residue that has had time and heat to thicken into a stubborn film. The answer is usually not more force. Start with the appliance maker’s care instructions, use a cleaner approved for that surface, give it time to work, and wipe away what has loosened before deciding whether you need another pass.
First, identify the surface and the mess
A glass-ceramic cooktop, painted enamel range, stainless top, burner grate, and oven window do not share one universal cleaning method. Abrasives that are acceptable on a removable grate can scratch glass or change a metal finish. Find the model’s care guide before you reach for a pad or scraper, especially if the surface has a coating.
Then separate grease from carbon, rust, and surface damage. Grease often feels tacky or looks amber at the edge. Carbon is darker and more brittle. A rainbow mark, pale patch, pit, or scratch may be heat or surface damage rather than residue. Cleaning can lift buildup, but it cannot restore a damaged finish.

What you need
- The appliance care guide and the cleaner label
- A surface-appropriate cleaner, such as Multi-Purpose Spray where both guides allow it
- Two clean microfiber cloths: one damp, one dry
- Gloves or ventilation if the product label calls for them
- Enough uninterrupted time for the dwell period printed on the cleaner label
The routine
-
Cool, clear, and test
Turn every burner off and wait until the surface is fully cool. Move removable grates or knobs only if the appliance manual says they can be removed. Brush away loose crumbs so they do not drag across the finish. Test the cleaner on a small, inconspicuous area, and never spray into ignition ports, vents, seams, controls, or electrical openings.
-
Cover the greasy film
Follow the product label for application. The goal is even contact with the greasy area, not a cloud of overspray across the whole range. On vertical oven glass or near a protected edge, applying the cleaner to the cloth first can give you more control. Do not combine it with an oven cleaner, bleach, ammonia, vinegar, or any other formula.
Tip: If the appliance guide names a specific cooktop cleaner or pad, that instruction wins. -
Give it time before adding force
Use exactly the dwell period printed on the cleaner label, and shorten or stop the treatment if the surface guide requires it. Keep the area from drying out only in the way the label permits. Dwell time lets you test what the cleaner can loosen before you reach for a more aggressive tool. Keep children and pets away from the work area while the product is sitting.
-
Wipe, rinse the cloth, and reassess
Wipe in controlled passes with the damp cloth, folding to a clean side as it loads with residue. Follow with a clean damp wipe if the product directions require rinsing, then dry the surface. If a greasy patch remains, repeat the same gentle routine once. Stop if you see scratching, discoloration, or a mark that does not change after two careful passes.

Common mistakes
- Cleaning while the stovetop is warm: Heat can dry a formula too quickly and may conflict with the appliance or cleaner instructions.
- Starting with a razor, scouring powder, or rough pad: Those tools can permanently mark some cooktops. Use only what the appliance maker explicitly allows.
- Mixing formulas for more power: More chemistry is not a better routine. Never mix household cleaners, and fully remove one product before using another.
Honest expectation
QUESTIONS.
Can I use this routine on a glass cooktop?
Only if both the cooktop maker and the cleaner label allow it. Glass-ceramic surfaces can scratch, and some manufacturers specify a particular cream, pad, or scraper.
Why is the surface still hazy after the grease is gone?
A haze can be leftover cleaner, mineral film, fine scratching, or heat damage. Try the maker’s recommended rinse and drying method. Stop if the mark does not change.
Should I scrub while the cleaner is dwelling?
No. Let the product sit for the time its label permits, then test with a damp cloth. Add only surface-approved agitation if residue remains.
Keep going
- Reset the under-sink cabinet: keep one useful specialist per recurring job
- Shop grease and stuck-on grime: compare the specialists built for this mess
- See how refill schedules work: choose from the schedules shown on eligible singles